E25 Tank Destroyer Build Log – Part 4

Well, happy circumstances never cease!  I was cleaning off our ultra-portable and happened to find a folder copy of my E25 tank destroyer before it was painted, showing all the PE parts applied – it is a little late to give a full build-log entry to that, but I’ll include the photos I found here as a reference item for those who were following my previous entries there. For your enjoyment, here they are…
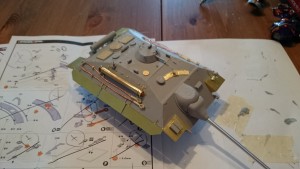
The cylinder there is the gun-cleaning kit, comprised of 21 separate PE parts. What a pain in the ass that was!

The cylinder there is the gun-cleaning kit, comprised of 21 separate PE parts. What a pain in the ass that was!

Hull Overview - Left

In a real-life TD, that periscope port slides along the curved mount to give a broader view.

In a real-life TD, that periscope port slides along the curved mount to give a broader view.

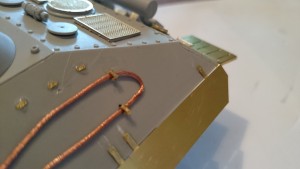
Each connector holding the tow cable in place is a three-piece hinged element.

Each connector holding the tow cable in place is a three-piece hinged element.

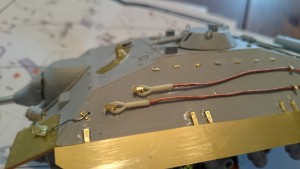
Schurzen in this pic is flying out straight with the hull because I hadn't figured out to bend the connectors in advance. I eventually used a metal ruler to hold the connectors attached while I used another to bend the schurzen evenly down.

Schurzen in this pic is flying out straight with the hull because I hadn’t figured out to bend the connectors in advance. I eventually used a metal ruler to hold the connectors attached while I used another to bend the schurzen evenly down.

A little closer view of the left side of the TD.

A little closer view of the left side of the TD.

The forward cap and chains of the gun cleaner - just to show the detail you can get from this thing.

The forward cap and chains of the gun cleaner – just to show the detail you can get from this thing.

This square tile is the base for the jack, which prevents the jack from being pushed into the earth under the weight of the tank.

This square tile is the base for the jack, which prevents the jack from being pushed into the earth under the weight of the tank.

Note the seven small plates running across the top - each of which has a wire grab-handle on it. Those were insanely fragile, and ultimately only about half of them survived.

Note the seven small plates running across the top – each of which has a wire grab-handle on it. Those were insanely fragile, and ultimately only about half of them survived.

The jack was cast resin, and the various tools either replaced or augmented those that came with the kit.

The jack was cast resin, and the various tools either replaced or augmented those that came with the kit.

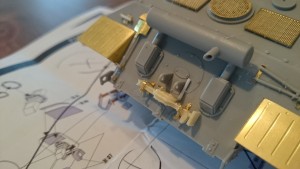
More views of the grilles and the shovel with its mounting hardware.

More views of the grilles and the shovel with its mounting hardware.

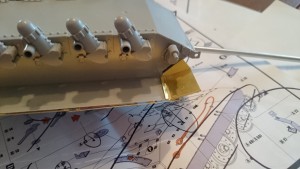
A view of the grilles and the bolt cutters attached to the rear.

A view of the grilles and the bolt cutters attached to the rear.

Rear Suspension

Rear Suspension

Forward Suspension

Forward Suspension

Just before I mounted the wheels, you can see here where the suspension is set up.

Just before I mounted the wheels, you can see here where the suspension is set up.

This entry was posted in Build Log, Model Kits and tagged , , , . Bookmark the permalink.

Leave a Reply

Your email address will not be published. Required fields are marked *

This site uses Akismet to reduce spam. Learn how your comment data is processed.